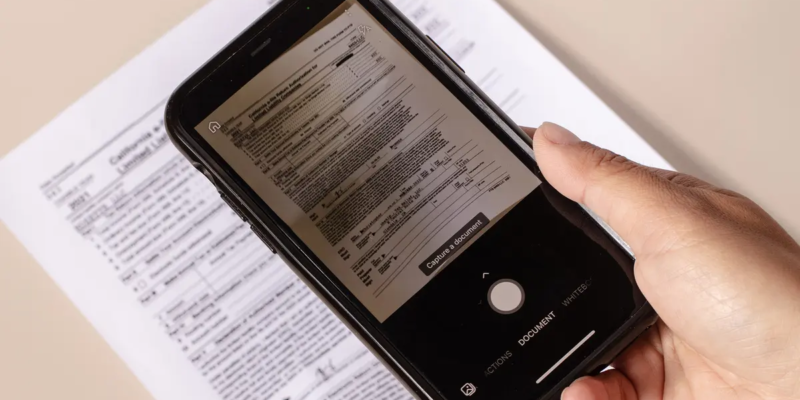
Scanning documents is now something that everyone needs to do, from people to businesses. If you need to scan and organize notes, contracts, or other important papers while you’re on the go, your iPhone is a great device for you. You can use the built-in features and apps on your iPhone to scan a paper. This complete guide will show you how to do it step by step. Let’s start learn how to scan a document on iPhone.
How to Scan a Document on iPhone
Scanning documents using your iPhone has never been easier. With the advancements in technology, the built-in camera on your iPhone can serve as a powerful scanner, allowing you to digitize physical documents and store them securely on your device. Whether you need to scan receipts for expense tracking, contracts for business purposes, or important personal documents, your iPhone can handle the task efficiently. Here are the ways you can scan a document on iPhone:
Using the Notes App to Scan Documents
The Notes app on your iPhone provides a convenient way to scan documents without the need for a third-party app. Follow these steps to scan a document using the Notes app:
- Step 1: Open the Notes App
To begin, locate and open the Notes app on your iPhone. If you can’t find it on your home screen, you can swipe down and use the search bar to locate it quickly.
- Step 2: Create a New Note
Once you have opened the Notes app, create a new note by tapping the “+” icon at the bottom center of the screen. Alternatively, you can choose to open an existing note if you prefer.
- Step 3: Access the Document Scanning Feature
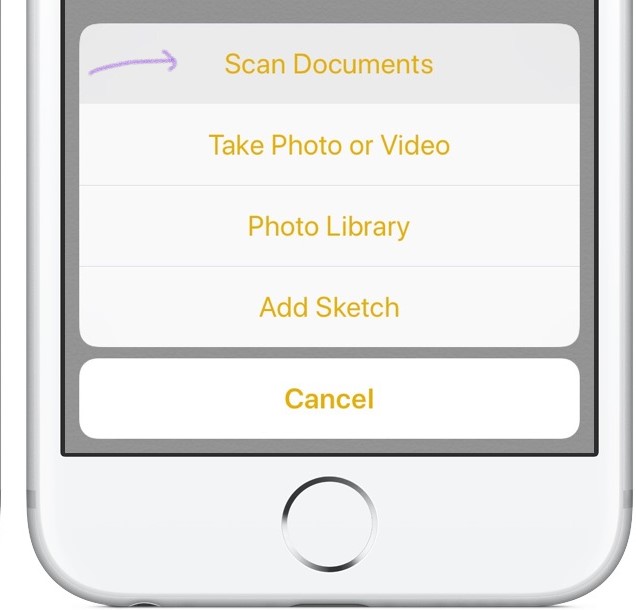
Within the note, tap the camera icon located above the keyboard. A menu will appear with different options. Select “Scan Documents” from the menu.
- Step 4: Start Scanning
Position your iPhone camera over the document you want to scan. You will see a yellow box appear, indicating that the app is searching for a document. Ensure that the document is well-lit and aligned within the frame.
- Step 5: Adjust the Scan if Needed
Once the document is recognized, the app will automatically scan it. If necessary, you can manually adjust the edges by dragging the blue dots to crop out any unnecessary portions. Tap “Keep Scan” to save the scanned document.
- Step 6: Save and Share the Scanned Document
After you have taken all the necessary scans, press “Done” to finish the scanning process. You can now save the scanned document by tapping “Save” within the note. From there, you can share it via email, messaging apps, or any other platform by tapping the share icon.
Using Third-Party Scanner Apps
Although the Notes app provides a convenient way to scan documents on your iPhone, there are also third-party scanner apps available with advanced features and integration with cloud storage services. Here are a few popular options:
- Option 1: Adobe Scan
Adobe Scan is a feature-rich scanning app that allows you to create high-quality scans of documents, receipts, whiteboards, and more. It offers intelligent image enhancement, text recognition, and the ability to save documents as editable PDFs. You can also sync your scanned documents with Adobe Document Cloud for easy access across devices.
- Option 2: Microsoft Office Lens
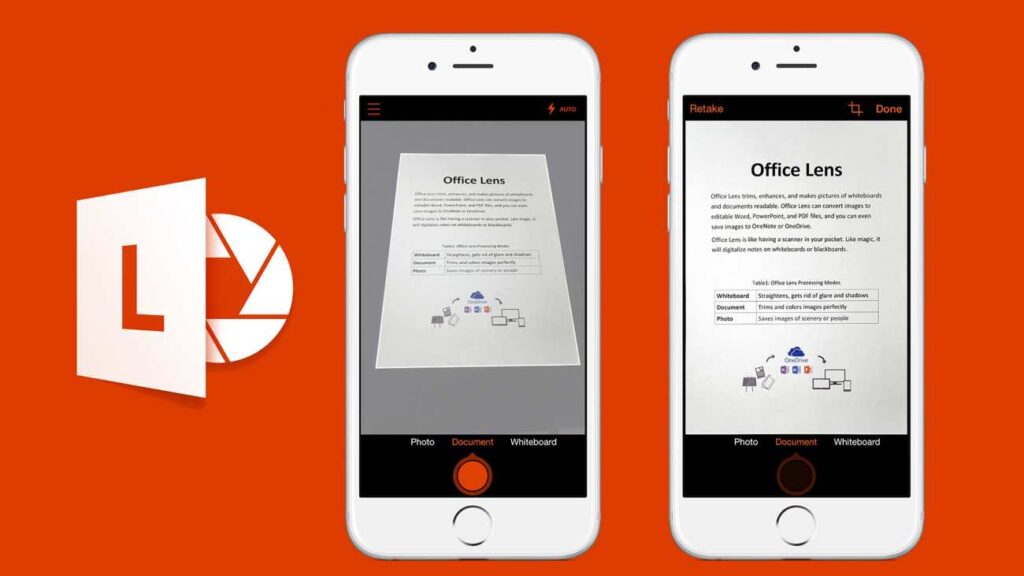
Microsoft Office Lens is another powerful scanning app that enables you to capture and digitize documents, whiteboards, and business cards. It integrates seamlessly with Microsoft Office applications, allowing you to convert scanned documents into Word, PowerPoint, or PDF files. The app also offers automatic cropping, image enhancement, and the ability to save files to OneDrive or other cloud storage services.
- Option 3: Scanbot
Scanbot is a versatile scanning app that provides an intuitive interface and advanced features. It offers automatic document detection, smart cropping, and text recognition. Additionally, Scanbot allows you to save scanned documents as PDFs, upload them to various cloud storage services, and even fax them directly from your iPhone.
How to Sign Documents on your iPhone
In addition to scanning documents, your iPhone’s Notes app allows you to digitally sign them. This feature is particularly useful when you need to sign and send documents electronically. Here’s how you can sign documents on your iPhone:
- Step 1: Open the Notes App and Select the Document
Launch the Notes app on your iPhone and select the document you want to sign.
- Step 2: Tap the Markup Button
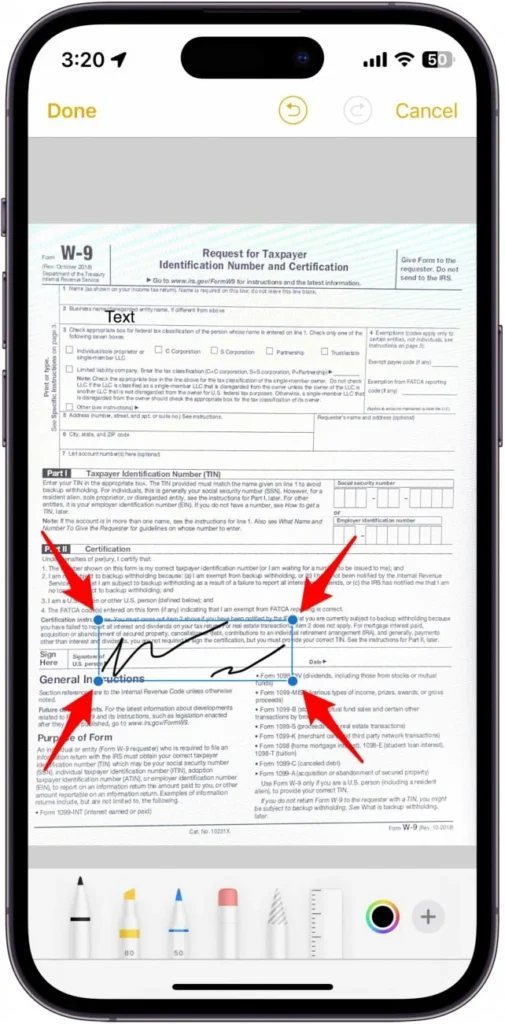
Once you have opened the document, tap the Markup button located at the top-right corner of the screen. It resembles a pen tip within a circle.
- Step 3: Create and Resize Your Signature
Within the Markup interface, tap the “+” button and select “Signature.” You can now create your signature using your finger or a stylus. Once created, you can resize and reposition it to fit the document.
- Step 4: Share the Signed Document
After signing the document, you can save it by tapping “Done” and then share it via email, messaging apps, or any other platform by tapping the share icon.
Also Read: How to Mirror iPhone to TV: Everything You Need to Know
Benefits of Scanning Documents with an iPhone
Scanning documents using your iPhone offers several benefits that make it a preferable option for many individuals and professionals. Here are some advantages of using your iPhone as a document scanner:
- Cost-Effectiveness
One of the major advantages of using your iPhone to scan documents is cost-effectiveness. You don’t need to invest in a separate scanner, as your iPhone’s built-in camera provides a high-quality scanning solution at no additional cost.
- Convenience and Portability
You can easily scan documents while on the move with your iPhone because it is always with you. Whether you’re at home, in the office, or traveling, you can easily capture and digitize documents without the need for bulky equipment.
- High-Quality Scans
With advancements in smartphone camera technology, iPhones are equipped with powerful cameras that can capture high-quality scans. This ensures that your scanned documents are clear, readable, and suitable for various purposes, such as printing or sharing digitally.
In Summary
The iPhone has so many built-in features and apps that it has never been easier to scan papers. Yes, now that you know how to scan a document on iPhone, you can quickly scan paper documents and keep them safe on your phone. Smartphone scanning on the iPhone is useful for both regular people and business people since it’s simple, cheap, and makes good pictures. Now that you know your iPhone will keep your papers safe, you can scan them without stress.
FAQs
- Does my iPhone or iPad have a document scanner?
Yes, most iPhones and iPads running iOS 11 or later have a built-in document scanning feature. This feature utilizes the device’s camera to capture and digitize physical documents.
- How do I scan a document with my iPhone or iPad?
To scan a document using your iPhone or iPad, open the Notes app, create a new note, and tap the camera icon. From there, select “Scan Documents” and follow the on-screen instructions to capture and save your scans.
- Does my iPhone scan documents into a PDF?
Yes, the scanning feature on your iPhone saves scanned documents as PDF files by default. This ensures compatibility and easy sharing of your scanned documents.
- Can iPhone scan documents without an app?
Yes, the built-in Notes app on your iPhone allows you to scan documents without the need for a third-party app. However, there are also third-party scanner apps available that offer additional features and customization options.
- Can you sign documents on an iPhone?
Yes, you can sign documents on your iPhone using the Markup feature in the Notes app. This feature allows you to create and add your digital signature to documents, making it convenient for electronic signing.


