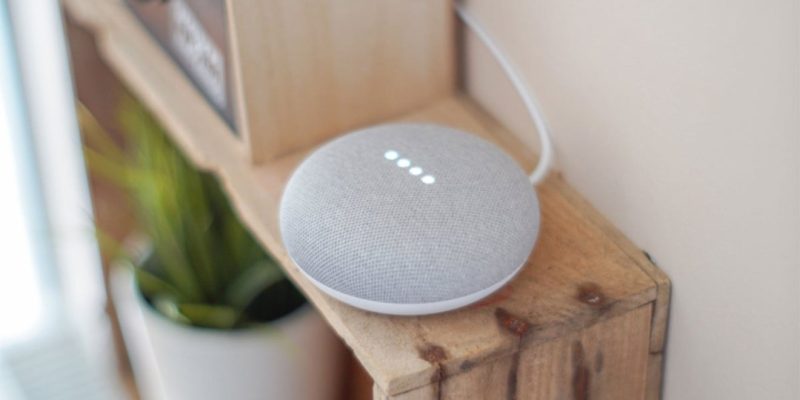
Google Home, now rebranded as Google Nest, is a smart personal assistant that makes it easy to control the devices in your smart home. But you need to know how to connect Google Home to WiFi in order to get the most out of it. This guide has simple, easy-to-follow steps that will help you get it done.
What Is Google Home?
It’s important to know what Google Home is before we start the linking process. Google Home is a line of smart speakers that the company made. It listens to your orders and acts on them using the Google Assistant platform.
You can ask Google Home to play your favorite songs, control smart home devices, or get general information. But in order to do these things, it needs a stable internet connection. So, adding Google Home to WiFi is a very important step.
Why Connect Google Home to WiFi?

Connecting Google Home to WiFi allows you to access a broad spectrum of features and functionalities. Here are a few benefits:
- Voice Control: With Google Home connected to WiFi, you can control various smart devices using voice commands.
- Access to Information: You can get real-time information about the weather, news updates, and more.
- Entertainment: Stream music, podcasts, or even audiobooks directly from the internet.
- Smart Home Management: Control your smart home devices, including lights, thermostats, and more.
How to Connect Google Home to WiFi for the First Time? (10 Steps)
Here’s how to connect your Google Home to WiFi for the first time:
- Step 1: Plug in your Google Home device.
- Step 2: Open the Google Home app on your mobile device.
- Step 3: Select or enter the Google account you wish to associate with the Google Home device.
- Step 4: The app will automatically discover the Google Home device. When it does, tap on ‘Next’.
- Step 5: The speaker will make a sound for verification. If you hear this sound, select ‘Yes’.
- Step 6: On the ‘Where is this device’ screen, select the location of your device (for example, Living Room).
- Step 7: Enter a unique name for the Google Home speaker.
- Step 8: From the list of available WiFi networks, choose the network to which you want to connect the Google Home device, then tap ‘Next’.
- Step 9: Enter the WiFi network password, and tap ‘Connect’.
- Step 10: After a brief delay, a successful connection message will appear.
Once these steps are successfully executed, your Google Home device will be connected to your WiFi network.
How to Connet Google Home to a New WiFi Network? (15 Steps)
Follow these steps if you already set up your Google Home device but need to connect it to a different WiFi network or a current network with a new password:
Step 1
First things first, open the Google Home app.
Step 2
Tap on your Google Home device.
Step 3
Find and tap on the “Settings” icon, which looks like a gear, in the upper right part of the screen to get to more settings. This move brings up a menu where you can change a number of device-related settings.
Step 4
In the settings menu, go to the “Device Information” area to see more information about the device. On that screen, tap the “WiFi” option to see and change the device’s WiFi settings.
Step 5
Selecting the “Forget This Network” option will disconnect your Google Home device from any networks it is currently connected to.

This will make it ready for a new network setup. This move makes it easier to switch to a different network or fixes problems with connectivity.
Step 6
Make sure you’re sure of your choice by clicking the “Forget WiFi Network” button.

This will delete the device’s current WiFi network settings, leaving a blank page for future network connections.
Step 7
Get back to the app’s main screen and look for the “device” button to get to more features or settings for the chosen device. If you press the device button again, you’ll see a list of controls and choices that you can use to make the device even more your own.
Step 8
To add a new device to your network or smart home environment, go to the settings menu and select “Add New Device.” This choice lets you add to the features and functions of your connected gadgets, making your smart home experience better as a whole.
Step 9
You’ll be prompted to go to your mobile device’s WiFi settings and connect to the Google Home hotspot shown in the network list.
Step 10
Return to the Google Home app. The speaker will make a sound for verification. If you heard this sound, select ‘Yes’.
Step 11
On the “Where is this device?” screen, you can choose the exact spot where you put your device so that it works best. Pick an accurate location descriptor that correctly describes where your device is physically located in your home. If you choose the right spot, the device will respond and give you information based on how close it is to different parts of your home.
Step 12
Give your Google Home speaker a name that is unique and easy to remember that describes where it is or what it is used for. Picking a unique name can help voice commands and device recognition work better, making conversations easier to understand and more suited to your needs. Giving your Google Home speaker a name that means something to you can also make managing multiple devices easier and improve your smart home experience.
Step 13
The Google Home app will show you a list of WiFi networks that it can find. Choose the network that you want to connect your Google Home device to. Pressing the “Next” button will take you to the next step in the setup process, which will make it easier to connect your Google Home device to the WiFi network you picked. This choice makes sure that everything works together smoothly and gives you access to all the smart features that Google Home has to offer.
Step 14
Type the assigned password into the marked field on your device to connect to the WiFi network. Once the right password has been entered, tap the “Connect” button to start the connection process. When you do this, your device will identify and connect securely to the given WiFi network. This will let you easily access online resources and services.
Step 15
Following a short delay, you can expect to see a confirmation message indicating that the connection has been established successfully. This message serves as a reassuring sign that the communication link has been established without any issues, allowing you to proceed with your tasks confidently.
Final Words
It’s great that Google Home can make your smart house experience better. To use Google Home to its fullest, you need to know how to connect Google Home to WiFi. We hope that this guide has given you the information you need to properly connect your Google Home to your WiFi network. Enjoy how easy it is to run your smart home with your voice!


