

Geotagging is the act of adding “Geographical information metadata” like location data (longitude, latitude, etc.) to a media, in our case to pictures taken with our phones. This is what Instagram geo-tagging is about.
In this article, I am going to share with you some ways to use Instagram location tags to drive more engagement to your Instagram.
What are Instagram location tags?
Instagram has a feature which helps you add a location tag to both your Instagram posts and stories, which shows your followers and audience where you are now or where you took those specific photos or videos.
But for businesses, the Instagram location tags work differently. In order to find products or services close-by, many people search for local businesses on Instagram.
So if you want to be found, you need to know how to create a location on Instagram, which is only yours and is unique for your business. Keep up with me to find out everything you need to know about Instagram locations and tags.
By the way, it might be really interesting for you to know How to stop sharing location secretly, you can read more about it in our guide: “How to stop sharing location without them knowing“.
How to add a location on Instagram?
The process to add Instagram locations is so easy and basic. Using the few steps mentioned below, you can add the location of your post.
After editing and filtering your Instagram post, you come to the page where you add a caption, tag usernames, and add a location.
Instagram has location services and automatically displays “Location” options near where you were while taking the picture! If you can’t find the right location between the suggestions, you can tap “>” to search for more. Just choose your location and post as usual.
How to add location tags to your Instagram photos after it has been posted?
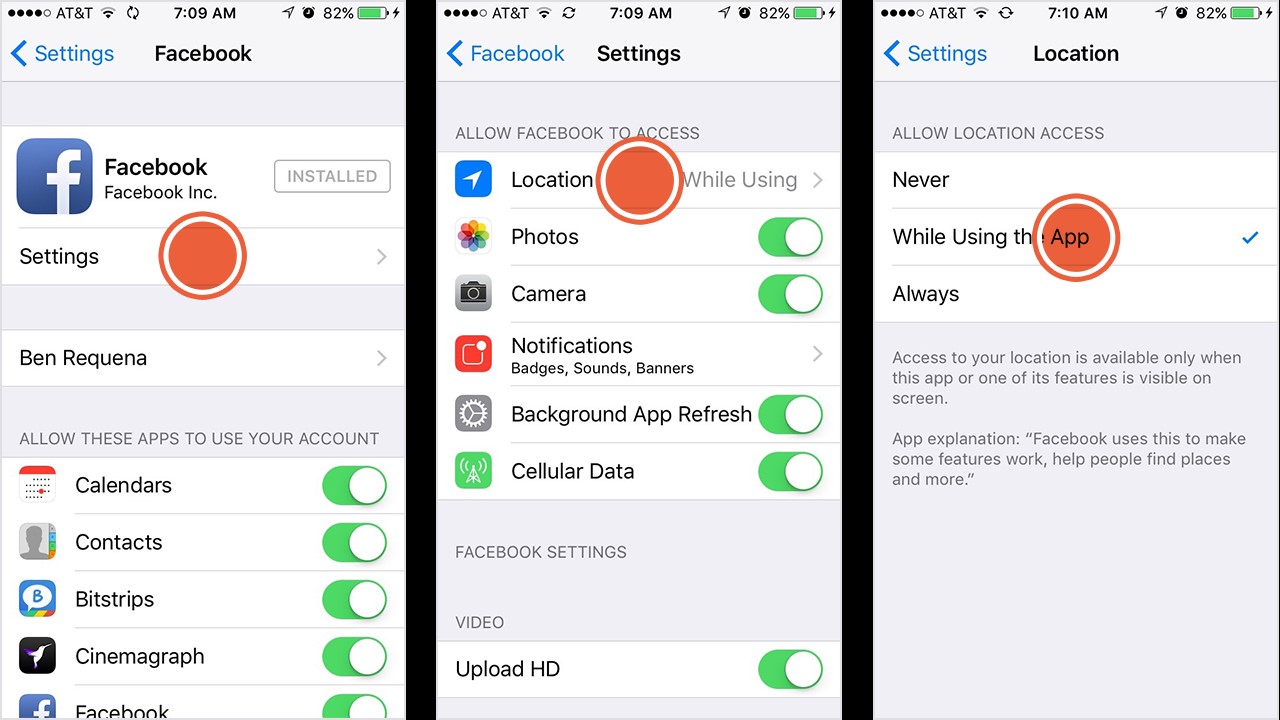
In an iOS mobile, you can turn on your location service so that whenever you take a picture, the geotag metadata will be added to the picture automatically. You can do this by these following steps:
- Go to your iPhone settings
- Tap on the privacy tab.
- Go to your location services and turn it on.
4. Make sure that the location service is turned on for every camera app you use, including Instagram.
If you post a photo with location tags on Instagram, the platform should be able to read the metadata and recommend the location to you when you search for it. It is not always accurate, but you can type in the name of your location and Instagram will search for it. The problem is that sometimes we forget to set the location while posting on Instagram and we end up with a blank location field above our post.
Don’t worry; we are going to show you a quick fix tip.
You can add, edit or remove the location tags on your Instagram posts. Just follow these steps:
- Go to your Instagram post (photo or video) to which you want to add the location.
- Click on the “Three-dot icon” at the top right of the screen.
- Tap on “Edit” from the menu.
- This will take you to the edit page, where you can change your caption, username tags, and Tap on “Add location,” search for your location or just use the arrow to search automatically.
- And done!
How to add location tags to your Instagram stories?
You can use a location sticker to add a geotag to your Instagram story.
- Add a picture or a video you want to post on your story.
- Tap on the sticker icon.
- Choose the location sticker from the menu.
- Add your location
- And done! You have added Instagram locations tags to your stories now.
What are the benefits of using Instagram Locations?
This can be really beneficial for location-based businesses. Instagram has relied on the Foursquare app’s API for location results in the geotag list of companies. The platform is played with the option of switching this information to Facebook’s data on locations. If your brand is registered as a location on either of these platforms, your business will appear in the search results for geotagging. Remember, if you create a custom location, it will be only available to yourself. It won’t make it public to everyone. However, having your brand listed as a location means users can “check-in” at your company through Instagram.
Here’s why this is so helpful:
First of all, people who click that geotag location can view all the other posts that people are uploading on that location. This can be profitable in showcasing your services or products but also reaching a new audience. Travelers or people new to the region can search the geotags to decide if they want to purchase from you.
Secondly, these geotagged pictures allow you for collecting user-generated content (UGC). All of these posts which are created by your audience, (If they have public accounts), will be received in the geotag search and you can share them with your followers. This means you notice your existing clients and appreciate them as well, and also it shows your audience another perspective of your company.
How to create a location on Instagram?
Here is a step-by-step guide on how to add a custom location on Instagram:
#1 Make sure your Facebook location services is turned on.
First, you should make sure your location services on mobile Facebook app is turned on. Or else you won’t be able to create a new custom location. Most people will have it turned on by default, so just to make sure, go to your settings and check it.

#2 Create a Facebook check-in status update
Sign into your Facebook app and begin creating a check-in status update. So just tap on the location button and then choose a selection from your nearby locations.
#3 Type your custom location title in the search box
Tap the search box and type in the “custom location” as you would like it to appear on Instagram. But remember, the first letter should be capitalized, and you can’t use symbols or emojis in your custom location.
#4 Tap “add” to create your custom location
Make sure you have spelled everything correctly then tap on the “Add” button and write down your custom location’s name. After that, you must Choose a Category and a Location. The easiest thing to do is to hit the “I’m here right now” button to choose your current location, or you can search for another location and choose that instead.
Now you can tap the “Create” button in the upper right-hand corner of the screen to add your new custom location to the Facebook database.
And that’s it!
I hope you liked this article. You can use the Instagram location tags in your posts or stories to show up on location search results and find more potential customers.
If you have any further questions about Instagram marketing, leaving a comment wouldn’t be a bad idea!